搭建vue3 & ts组件库脚手架 - 自己撸组件库篇一
大家好,我是鸽鸽。
在vue项目中,我们一般使用element-plus和vant组件库。
多个项目会有一些公共的组件,我们如何将其打包成一个组件库维护起来呢?
如何暴露组件类型,按需自动导入又是如何实现的?
这篇文章我们一起来学习一下
相关代码在这 learn-create-compoents-lib/class1,建议搭配食用
系列文章
《搭建vue3 & ts组件库脚手架 - 自己撸组件库篇一》
《组件库版本的管理和发布 - 自己撸组件库篇二》
《在组件库中封装element-plus - 自己撸组件库篇三》
目标
pnpm搭建monorepo项目,和使用workspace测试组件库- 组件支持
typescript,可以被使用的项目识别 - 组件支持整体导入、按需自动导入
环境要求
node ≥ 18 , pnpm ≥ 8 , vue ≥ 3.3
初始化项目模板
首先使用vite和pnpm 创建一个项目模板,这里我们使用pnpm,方便后面monorepo的使用。
1 | pnpm create vite |
在交互命令中填写项目名称,选择 Vue + Typescript 模板
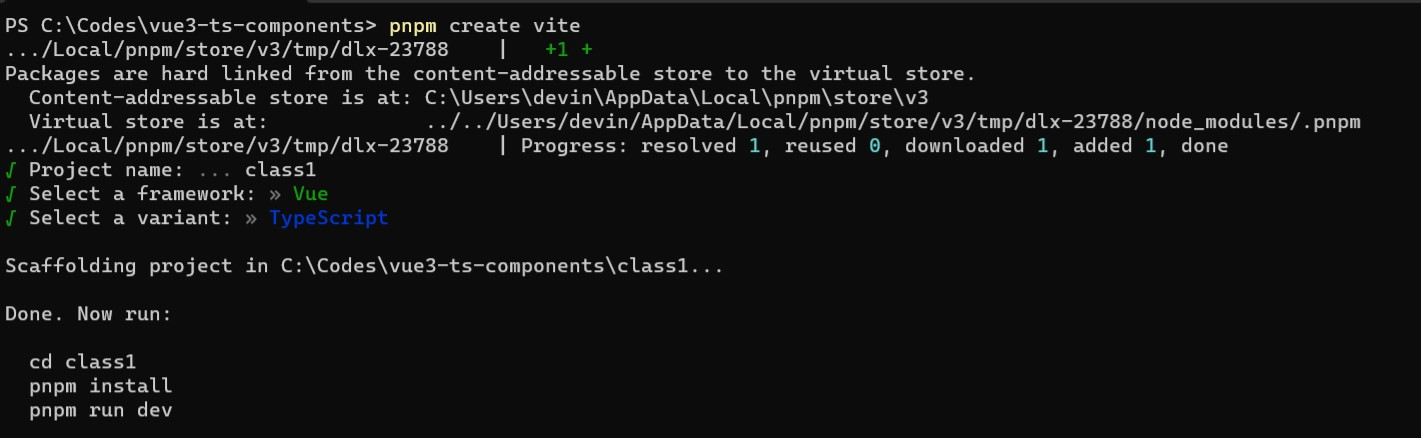
然后进入项目目录,使用 pnpm install 安装依赖
使用monorepo管理组件库
使用 monorepo 可以将多个包放在一下项目下维护,包之间可以互相引用,相同的依赖和配置也可以统一维护起来。除了组件库,我们可能后面还会新增工具库和插件库,使用monorepo可以更好的进行管理。
创建过程如下:
首先指定
monorepo目录。在项目根目录创建packages文件夹和pnpm-workspace.yaml文件,文件的内容为:1
2packages:
- "packages/**"这样就可以指定项目
packages下的文件夹为子包。在
packages文件夹下新建components文件夹,并在新建的文件夹中新建一个package.json文件,初始内容如下:1
2
3
4
5
6
7
8{
"name": "@giegie/components",
"version": "0.0.1",
"description": "练习了2年半的高性能组件库",
"scripts": {
}
}其中
@giegie/component是npm包的名称,@giegie是包的作用域,可以避免包的冲突。
创建第一个组件
我们先来创建一个简单的 Input 组件用作测试,如图所示,需要在src下建立一个Input文件夹,且需要创建几个固定的文件:
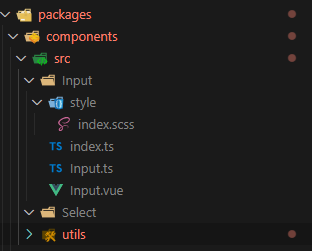
style/index.scss— 用于定义组件的样式。在里面补充一点简单的样式:1
2
3
4
5.gie-input{
&__control{
color: red;
}
}为什么样式要拆开而不是直接写在Input组件里呢? 因为我们需要在构建时打包成一个css文件用于组件库整体导入。按需导入时,样式放在约定的目录,也方便让按需导入的插件自动引入样式。
Input.ts— 用于定义类型文件,如Input的props类型,emit类型和instance类型等,内容如下:1
2
3
4
5
6
7
8
9
10
11
12
13
14
15
16
17
18
19
20
21import Input from './Input.vue'
/**
* 定义props类型
*/
export interface InputProps {
modelValue: string
disabled?: boolean
}
/**
* 定义emit类型
*/
export type InputEmits = {
'update:modelValue': [value: string]
}
/**
* 定义instance类型
*/
export type InputInstance = InstanceType<typeof Input>InputInstance是用来干啥的? 在写公共组件时,我们会使用defineExpose暴露一些方法。如在element-plus中,就会使用formRef.validate来校验表单,instance里就有暴露方法的类型签名。Input.vue— 组件文件。内容如下:1
2
3
4
5
6
7
8
9
10
11
12
13
14
15
16
17
18
19
20
21
22
23
24
25
26
27
28
29
30
31
32
33
34
35
36
37<template>
<div class="gie-input">
<input v-model="state" ref="inputRef" class="gie-input__control" type="text" :disabled="props.disabled">
</div>
</template>
<script setup lang="ts">
import { computed, ref } from 'vue'
import type { InputEmits, InputProps } from './Input';
defineOptions({
name: 'GieInput',
})
const emit = defineEmits<InputEmits>()
const props = withDefaults(defineProps<InputProps>(), {
modelValue: '',
disabled: false
})
const state = computed({
get: () => props.modelValue,
set: (val) => {
emit('update:modelValue', val)
}
})
const inputRef = ref<HTMLInputElement>()
function focus (){
inputRef.value?.focus()
}
defineExpose({
focus
})
</script>在该组件中简单的定义了组件名、代理了一下
v-model,并暴露出了一个方法focus。index.ts— 定义Input组件的入口文件1
2
3
4
5
6
7
8
9import { withInstall } from '../utils/install'
import Input from './Input.vue'
export const GieInput = withInstall(Input)
export default GieInput
export * from './Input.vue'
export * from './Input'在入口文件中,使用
withInstall封装了一下导入的Input组件,并默认导出。且在下面导出了所有类型文件。这个
withInstall函数的作用就是把组件封装成了一个可被安装,带install方法的vue插件,这个函数我是直接从element-plus项目复制的😂。1
2
3
4
5
6
7
8
9
10
11
12
13
14
15
16
17
18
19import type { App, Plugin } from 'vue'
export type SFCWithInstall<T> = T & Plugin
export const withInstall = <T, E extends Record<string, any>>(
main: T,
extra?: E
) => {
(main as SFCWithInstall<T>).install = (app): void => {
for (const comp of [main, ...Object.values(extra ?? {})]) {
app.component(comp.name, comp)
}
}
if (extra) {
for (const [key, comp] of Object.entries(extra)) {
(main as any)[key] = comp
}
}
return main as SFCWithInstall<T> & E
}
完善打包入口文件
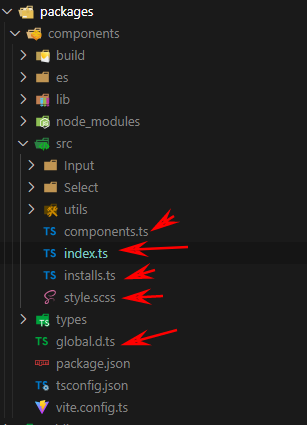
style.scss— 这个样式文件用来导入所有组件的样式,之后会通过编译生成一个包含所有组件样式的css文件,用于整体导入1
@import "./Input/style/index.scss";
components.ts— 这个文件用来代理导出组件里的vue文件和类型声明,内容如下:1
export * from './Input'
这样做的目的,是为了之后可以在项目里对组件或类型进行导入,如:
1
2
3
4
5
6
7
8
9
10
11
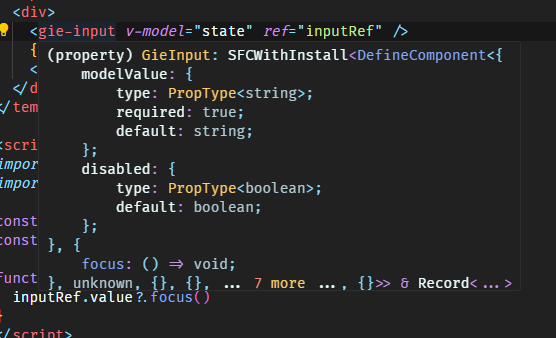
12
13<template>
<gie-input v-model="state" ref="inputRef" />
</template>
<script setup lang="ts">
import { ref } from 'vue';
import { GieInput } from '@giegie/components';
import type { InputInstance } from '@giegie/components';
const state = ref('')
const inputRef = ref<InputInstance>()
</script>installs.ts— 将组件的默认导出,也就是经过withInstall处理的vue组件插件导入进来,封装成一个数组,给下面的入口文件使用1
2
3
4
5import GieInput from './Input'
export default [
GieInput
]index.ts— 组件库入口文件,在这个文件里,我们需要导出components.ts里代理的vue组件和类型,并将installs.ts导出的插件数组交给makeInstaller处理成一个支持整体导入的插件:1
2
3
4
5
6import { makeInstaller } from './utils/install'
import installs from './installs'
export * from './components'
export default makeInstaller([...installs])makeInstaller实际上也是一个vue插件,他将组件插件循环进行安装,也是从element-plus复制的😂。1
2
3
4
5
6
7
8
9
10import type { App,Plugin } from 'vue'
export const makeInstaller = (components: Plugin[] = []) => {
const install = (app: App) => {
console.log(components)
components.forEach((c) => app.use(c))
}
return {
install,
}
}global.d.ts— 这个文件位于components包的根目录,用于给vscode的volar插件提示我们组件的属性的类型1
2
3
4
5
6
7
8
9
10declare module 'vue' {
export interface GlobalComponents {
GieInput: typeof import('@giegie/components')['GieInput']
}
interface ComponentCustomProperties {
}
}
export {}
编写打包配置
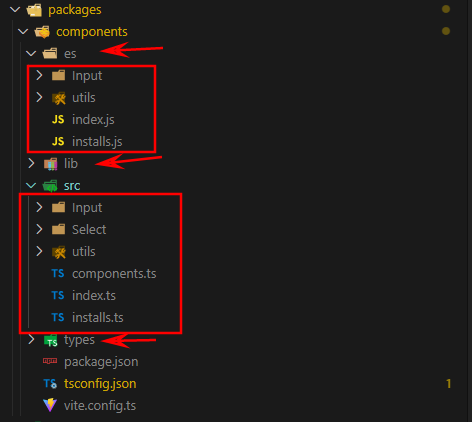
我们最终的目标是使用vite打包出 es、lib、types 3个目录,lib下的组件是commonjs版的,es下的组件是 es module 版的,types 里是类型声明文件。而且打包出来的文件目录要和src源码的文件目录保持一致,这样才能方便的按需导入。
对于样式,我们使用gulp和sass进行既对目录下的单独scss文件进行编译,最后也合并成一个文件。
使用gulp不仅用来处理sass文件,更重要的是可以用来控制打包流程。
我们先安装一些依赖
vite-plugin-dts用来生成类型声明文件:1
pnpm add vite-plugin-dts -wD
gulp和相关依赖安装到components子包下1
pnpm add gulp gulp-sass sass gulp-autoprefixer shelljs -D --filter components
在
components下 新建一个vite.config.ts文件,配置和说明如下:1
2
3
4
5
6
7
8
9
10
11
12
13
14
15
16
17
18
19
20
21
22
23
24
25
26
27
28
29
30
31
32
33
34
35
36
37
38
39
40
41
42
43
44
45
46
47
48
49
50
51
52
53
54
55
56
57
58
59
60import { defineConfig } from 'vite'
import type { UserConfig } from 'vite'
import vue from '@vitejs/plugin-vue'
import dts from 'vite-plugin-dts'
export default defineConfig(() => {
return {
build: {
rollupOptions: {
// 将vue模块排除在打包文件之外,使用用这个组件库的项目的vue模块
external: ['vue'],
// 输出配置
output: [
{
// 打包成 es module
format: 'es',
// 重命名
entryFileNames: '[name].js',
// 打包目录和开发目录对应
preserveModules: true,
// 输出目录
dir: 'es',
// 指定保留模块结构的根目录
preserveModulesRoot: 'src',
},
{
// 打包成 commonjs
format: 'cjs',
// 重命名
entryFileNames: '[name].js',
// 打包目录和开发目录对应
preserveModules: true,
// 输出目录
dir: 'lib',
// 指定保留模块结构的根目录
preserveModulesRoot: 'src',
},
],
},
lib: {
// 指定入口文件
entry: 'src/index.ts',
// 模块名
name: 'GIE_COMPONENTS'
},
},
plugins: [
vue(),
dts({
// 输出目录
outDir: ['types'],
// 将动态引入转换为静态(例如:`import('vue').DefineComponent` 转换为 `import { DefineComponent } from 'vue'`)
staticImport: true,
// 将所有的类型合并到一个文件中
rollupTypes: true
})
],
} as UserConfig
})在components文件夹下新建
build文件夹,用于编写打包流程控制逻辑,文件和内容如下: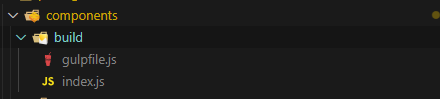
1
2
3
4
5
6
7
8
9
10
11
12
13
14
15
16
17
18
19
20
21
22
23
24
25
26
27
28
29
30
31
32
33
34
35
36
37
38
39
40
41
42
43
44
45
46
47
48// index.js
import gulp from 'gulp'
import { resolve,dirname } from 'path'
import { fileURLToPath } from 'url'
import dartSass from 'sass'
import gulpSass from 'gulp-sass'
import autoprefixer from 'gulp-autoprefixer'
import shell from 'shelljs'
const componentPath = resolve(dirname(fileURLToPath(import.meta.url)), '../')
const { src, dest } = gulp
const sass = gulpSass(dartSass)
// 删除打包产物
export const removeDist = async () => {
shell.rm('-rf', `${componentPath}/lib`)
shell.rm('-rf', `${componentPath}/es`)
shell.rm('-rf', `${componentPath}/types`)
}
// 构建css
export const buildRootStyle = () => {
return src(`${componentPath}/src/style.scss`)
.pipe(sass())
.pipe(
autoprefixer()
)
.pipe(dest(`${componentPath}/es`))
.pipe(dest(`${componentPath}/lib`))
}
// 构建每个组件下单独的css
export const buildStyle = () => {
return src(`${componentPath}/src/**/style/**.scss`)
.pipe(sass())
.pipe(
autoprefixer()
)
.pipe(dest(`${componentPath}/es`))
.pipe(dest(`${componentPath}/lib`))
}
// 打包组件
export const buildComponent = async () => {
shell.cd(componentPath)
shell.exec('vite build')
}1
2
3
4
5
6
7
8
9
10
11
12// gulpfile.js
import gulp from 'gulp'
import { removeDist,buildRootStyle, buildStyle, buildComponent } from './index.js'
const { series } = gulp
export default series(
removeDist,
buildComponent,
buildStyle,
buildRootStyle,
)在components文件夹下新建一个tsconfig.json文件,内容如下:
1
2
3
4
5
6
7
8
9
10{
"extends": "../../tsconfig.json",
"include": [
"src"
],
"compilerOptions": {
"moduleResolution": "node",
"baseUrl": "."
}
}这里主要是将
moduleResolution改为node,使打包出来的类型产物都可以正确的写入到一个文件里修改components包下的package.json文件,添加一些配置:
1
2
3
4
5
6
7
8
9
10
11
12
13
14
15
16
17
18
19
20
21
22
23
24
25
26
27
28{
"name": "@giegie/components",
"version": "0.0.1",
"description": "练习了2年半的高性能组件库",
"main": "lib",
"module": "es",
"type": "module",
"types": "types/index.d.ts",
"files": [
"es",
"lib",
"types",
"global.d.ts"
],
"scripts": {
"build": "gulp -f build/gulpfile.js"
},
"keywords": [],
"author": "",
"license": "ISC",
"devDependencies": {
"gulp": "^4.0.2",
"gulp-autoprefixer": "^8.0.0",
"gulp-sass": "^5.1.0",
"sass": "^1.67.0",
"shelljs": "^0.8.5"
}
}具体修改内容为:
- main指定cjs入口
- module指定esm入口
- type字段的值设置为”module”时,表示该项目是一个ES模块项目
- types表示类型声明文件位置
- files表示发包时哪些文件将上传
- scripts添加build打包命令
在根目录的
package.json中加入build命令1
2
3"scripts": {
"build": "pnpm --filter=@giegie/* run build"
}这个
build命令的意思是,执行所有的以@giegie开头的子包的build命令准备工作做好后执行
npm run build命令,没有报错的话,会和我生成出一样的产出物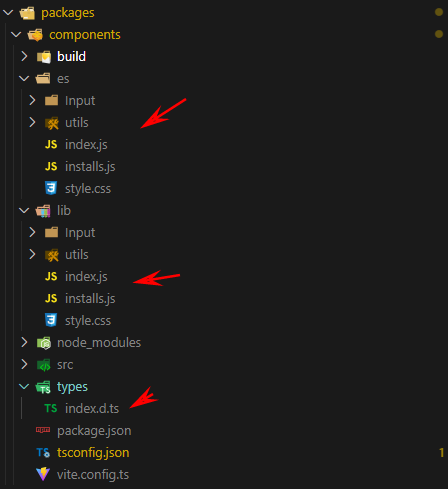
整体导入
目前打包出来的产物已经可以直接用来整体导入了,使用pnpm的workspace特性,不需要先发布包就可以直接用pnpm安装这个包用作测试
使用命令安装我们的
@giegie/components组件库到根项目1
pnpm add @giegie/components@* -w
在项目根目录的
tsconfig.json添加组件类型文件:1
2
3
4
5{
"compilerOptions": {
"types": ["@giegie/components/global"]
}
}在src的
main.ts文件中整体导入组件库和样式1
2
3
4
5
6
7
8
9import { createApp } from 'vue'
import '@giegie/components/es/style.css'
import App from './App.vue'
import GieComponents from '@giegie/components'
console.log(GieComponents)
createApp(App)
.use(GieComponents)
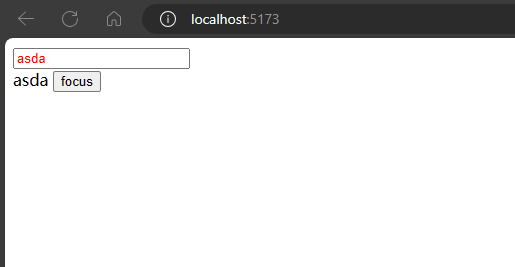
.mount('#app')在App.vue中编写测试代码
1
2
3
4
5
6
7
8
9
10
11
12
13
14
15
16
17
18
19<template>
<div>
<gie-input v-model="state" ref="inputRef" />
{{ state }}
<button @click="onFocus">focus</button>
</div>
</template>
<script setup lang="ts">
import type { InputInstance } from '@giegie/components';
import { ref } from 'vue';
const state = ref('')
const inputRef = ref<InputInstance>()
function onFocus(){
inputRef.value?.focus()
}
</script>运行npm run dev 命令,可以在浏览器中看到效果
按需自动导入
完整导入所有组件会使项目打包出来的产物非常大,在element-plus中可以使用unplugin-vue-components 和 unplugin-auto-import 按需自动导入需要的组件,文档地址。这个插件提供了多个组件的resolver,我们可以模仿他们的格式,自己写一个解析我们组件的resolver
我们在packages新建一个子包,命名为resolver,并创建下面2个文件
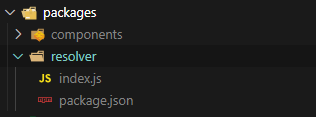
index.js— 解析插件的入口文件1
2
3
4
5
6
7
8
9
10
11
12
13
14
15
16
17
18
19
20function GieResolver () {
return {
type: 'component',
resolve: (name) => {
if (name.startsWith('Gie')) {
const partialName = name.slice(3)
return {
name: 'Gie' + partialName,
from: `@giegie/components`,
sideEffects: `@giegie/components/es/${partialName}/style/index.css`
}
}
}
}
}
module.exports = {
GieResolver
}上面的代码大概意思是,解析到一个组件以“Gie”开头时,返回组件名称、组件位置、组件样式位置给
unplugin-vue-components和unplugin-auto-import自动导入。package.json1
2
3
4
5
6
7
8{
"name": "@giegie/resolver",
"version": "0.0.1",
"description": "组件库自动导入插件",
"main": "./index",
"author": "",
"license": "ISC"
}
安装自动导入插件和我们编写的解析插件到根项目
1 | pnpm add unplugin-vue-components unplugin-auto-import @giegie/resolver@* -Dw |
在根目录的vite.config.ts 中,加入配置
1 | import { defineConfig } from 'vite' |
将根目录的 tsconfig.json 中types改成如下文件
1 | { |
注释掉main.ts中的完整导入代码
1 | import { createApp } from 'vue' |
运行 npm run dev ,可以看到类型和网页上的内容都已经成功导入了近来。
总结
本篇文章介绍了如何使用pnpm和vite搭建组件库脚手架,组件ts类型的导出,以及整体导入和按需导入实现的方法。
但是写好的组件库还没有发布到npm仓库上。
使用pnpm管理组件库版本和发布的方法鸽到下一篇文章再说咯,拜拜。
搭建vue3 & ts组件库脚手架 - 自己撸组件库篇一